Behind the Bench: Upleveling and Experimenting with New Techniques
Last week, I had two creative experiences that developed my skills as a designer. First, I spent a day behind the bench at Melody Jean studios. Next, I spent two days at Chimera Maker's Space for a class in Cloisonné enameling. This post gives you a behind-the-scenes look at these beautiful processes!
Last week, I had two creative experiences that developed my skills as a designer. First, I spent a day behind the bench at Melody Jean studios. Next, I spent two days at Chimera Maker's Space for a class in Cloisonné enameling. This post gives you a behind-the-scenes look at these beautiful processes!
First stop: Metalsmithing in Oakland, CA
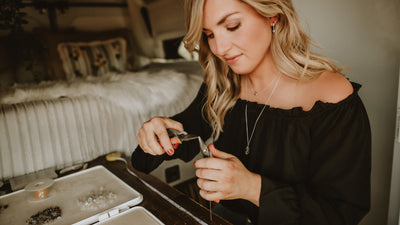
Last week, I spent a day working with my friend Melody in her jewelry studio. I really admire her skills in metal work and stone setting, so I asked her to help me execute a design I had sketched out. It was the perfect opportunity for us to get creative together and exchange knowledge. As I walked up to Melody's studio, I was surrounded by quaint houses sprinkled with colorful murals. Art grows in every nook and cranny of Oakland. Melody Jean works in an artist's space that houses numerous other makers, so walking inside you can find inspiration at every turn.
I arrived with a design I had sketched for statement earrings featuring one of my favorite stones: Buffalo Turquoise. I needed some help with the techniques to execute the design, and I also don't own all the right equipment yet. Melody has her own line of amazing handmade jewelry that features metalsmithing with organic textures and shapes, plus big, beautiful stones. I knew she was the perfect person I wanted to learn from to bring my design to life. Here's a look at what we worked on:
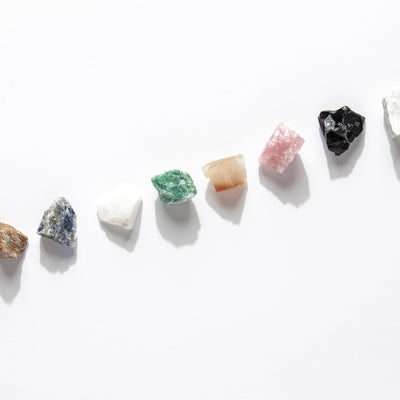
Sketches and Stones
I wanted my earrings to be bezeled gemstone posts with a large drop circle. I purchased a third piece of Buffalo Turquoise with the original idea of making a pendant, but after sketching it out I decided that was too big for my taste so we went with a big, bold ring instead!
Bezel Making
After finalizing the details of our design, we got to work on making bezels. Setting a stone starts with creating a bezel (a cup made of metal that fits the stone perfectly) using soldering. After making our bezels, we moved onto making the large rings for the earrings, and putting posts on the back of the studs. Melody taught me how to use her equipment so I could be hands-on in making my design, with her expert instruction.
Ring of Fire
We made the hoops out of sterling silver by forming, soldering, and hammering them (for shape and texture). We then attached them to the post earrings. Melody had a great idea to use a 14k gold fill ring to attach the pieces, adding a multi-metal element to the piece that I love!
Drops of Gold
I love the mixed metals that we added to these pieces. It adds such a fun element to the design. Melody showed me how to ball metal, using 14k gold for the ring accents and a 14k gold-fill jump ring for the earrings.
The finished product -
I couldn't be happier with how these turned out!
Cloisonné Enameling in Sebastopol
I've been wanting to learn enameling for a while now, so when I saw that Chimera was offering a class in Cloisonné enameling, I signed up immediately. I actually didn't know what Cloisonné meant, but I was really excited to learn! It turns out, Cloisonné is a type of enameling on metal surfaces that involves using wire to section surface and separate the colors. Our teacher, Anita Selinger has been producing her own jewelry designs for over 40 years and is a master of her craft. To my delight, Anita was an excellent teacher, and I left with so much knowledge!
These are some examples of Anita's pieces using cloisonné. She uses bright enamel colors and impeccable technique to create her colorful pendants. She also uses wax carving and casting techniques to create her custom settings, and finishes with beautiful, precious gems. Anita's jewelry is full of creativity, color, and attention to detail.
We each got a silver disc to work on, and we sketched out our designs for how we would divide our disc into sections to fill with color. I decided I would make a desert landscape. Here's the progression of my piece through every step:
Step 1: Texture the silver disc
Step 2 & 3: Sift on clear enamel, add metal wires. The wires are held in place by embedding them slightly into the clear enamel.
Step 4: Wash the pigments and begin filling in the sections.
We used a wet-packing method, mixing the enamel with water and using a paint brush to fill in the sections. Then, the enamel has to dry before being fired in the kiln.
Filing in the sky using 4 different pigments to create a fading effect
All filled in and ready for the first firing! This process takes quite a bit of time because of the time to fill in each section, plus the firing in the kiln, and down time between each layer (sometimes up to 4 layers are required).
Color development after 1 firing in the kiln. You can see how the enamel condenses when melted, so this is why we have to go back and add more layers until we fill in the sections to an even surface.
After 2 firings in the kiln. We fired our pieces around 1450 degrees.
At this point, I decided to add a moon to my design. I used 24k gold foil. I attached it to the piece by setting it on top, firing in the kiln, and smoothing with an agate burnisher when it came out to press it in. Then, I sealed with a layer of clear enamel.
Once the sections have been evenly filled with enamel, the piece is "stoned" to bring the piece to a totally even surface. Then, it is fired one last time in the kiln.
My final piece
Two finished pieces
Enamel & Color
One of the reasons I'm so interested in enamel is the endless color possibilities! We learned about the difference between leaded and unleaded enamels, and why it's important to sift enamels before applying to get the best results.
Sam kept us company in the jewelry studio.


Leave a comment